
NiSi V7 Filter Kit - Best Filters for Landscape Photography?
For most landscape images I capture, I use one or two filters in front of my lens, but what are the best filters for landscape photos?
What is the best Filter system for Landscape Photography?
With the True Colour Circular Polariser, improved bayonet system to attach the CPL, and the intuitive locking mechanism, the new NiSi V7 is one of the best filter systems for landscape photography.
If you are looking to build up a set of filters for your photography, check out the Essential Filters for the Landscape Photographer’s Toolkit, where I run through all the filters you need for shooting landscapes.
The improvements made over the V6 version make the NiSi filters easier to set up and quicker to change over.
I've found less color casting in the images I shot right across the NiSi filter range. As a result, the colors captured through the filters and polariser are more natural, providing a better RAW file for post-processing.
Let's take a closer look at the V7 Kit.
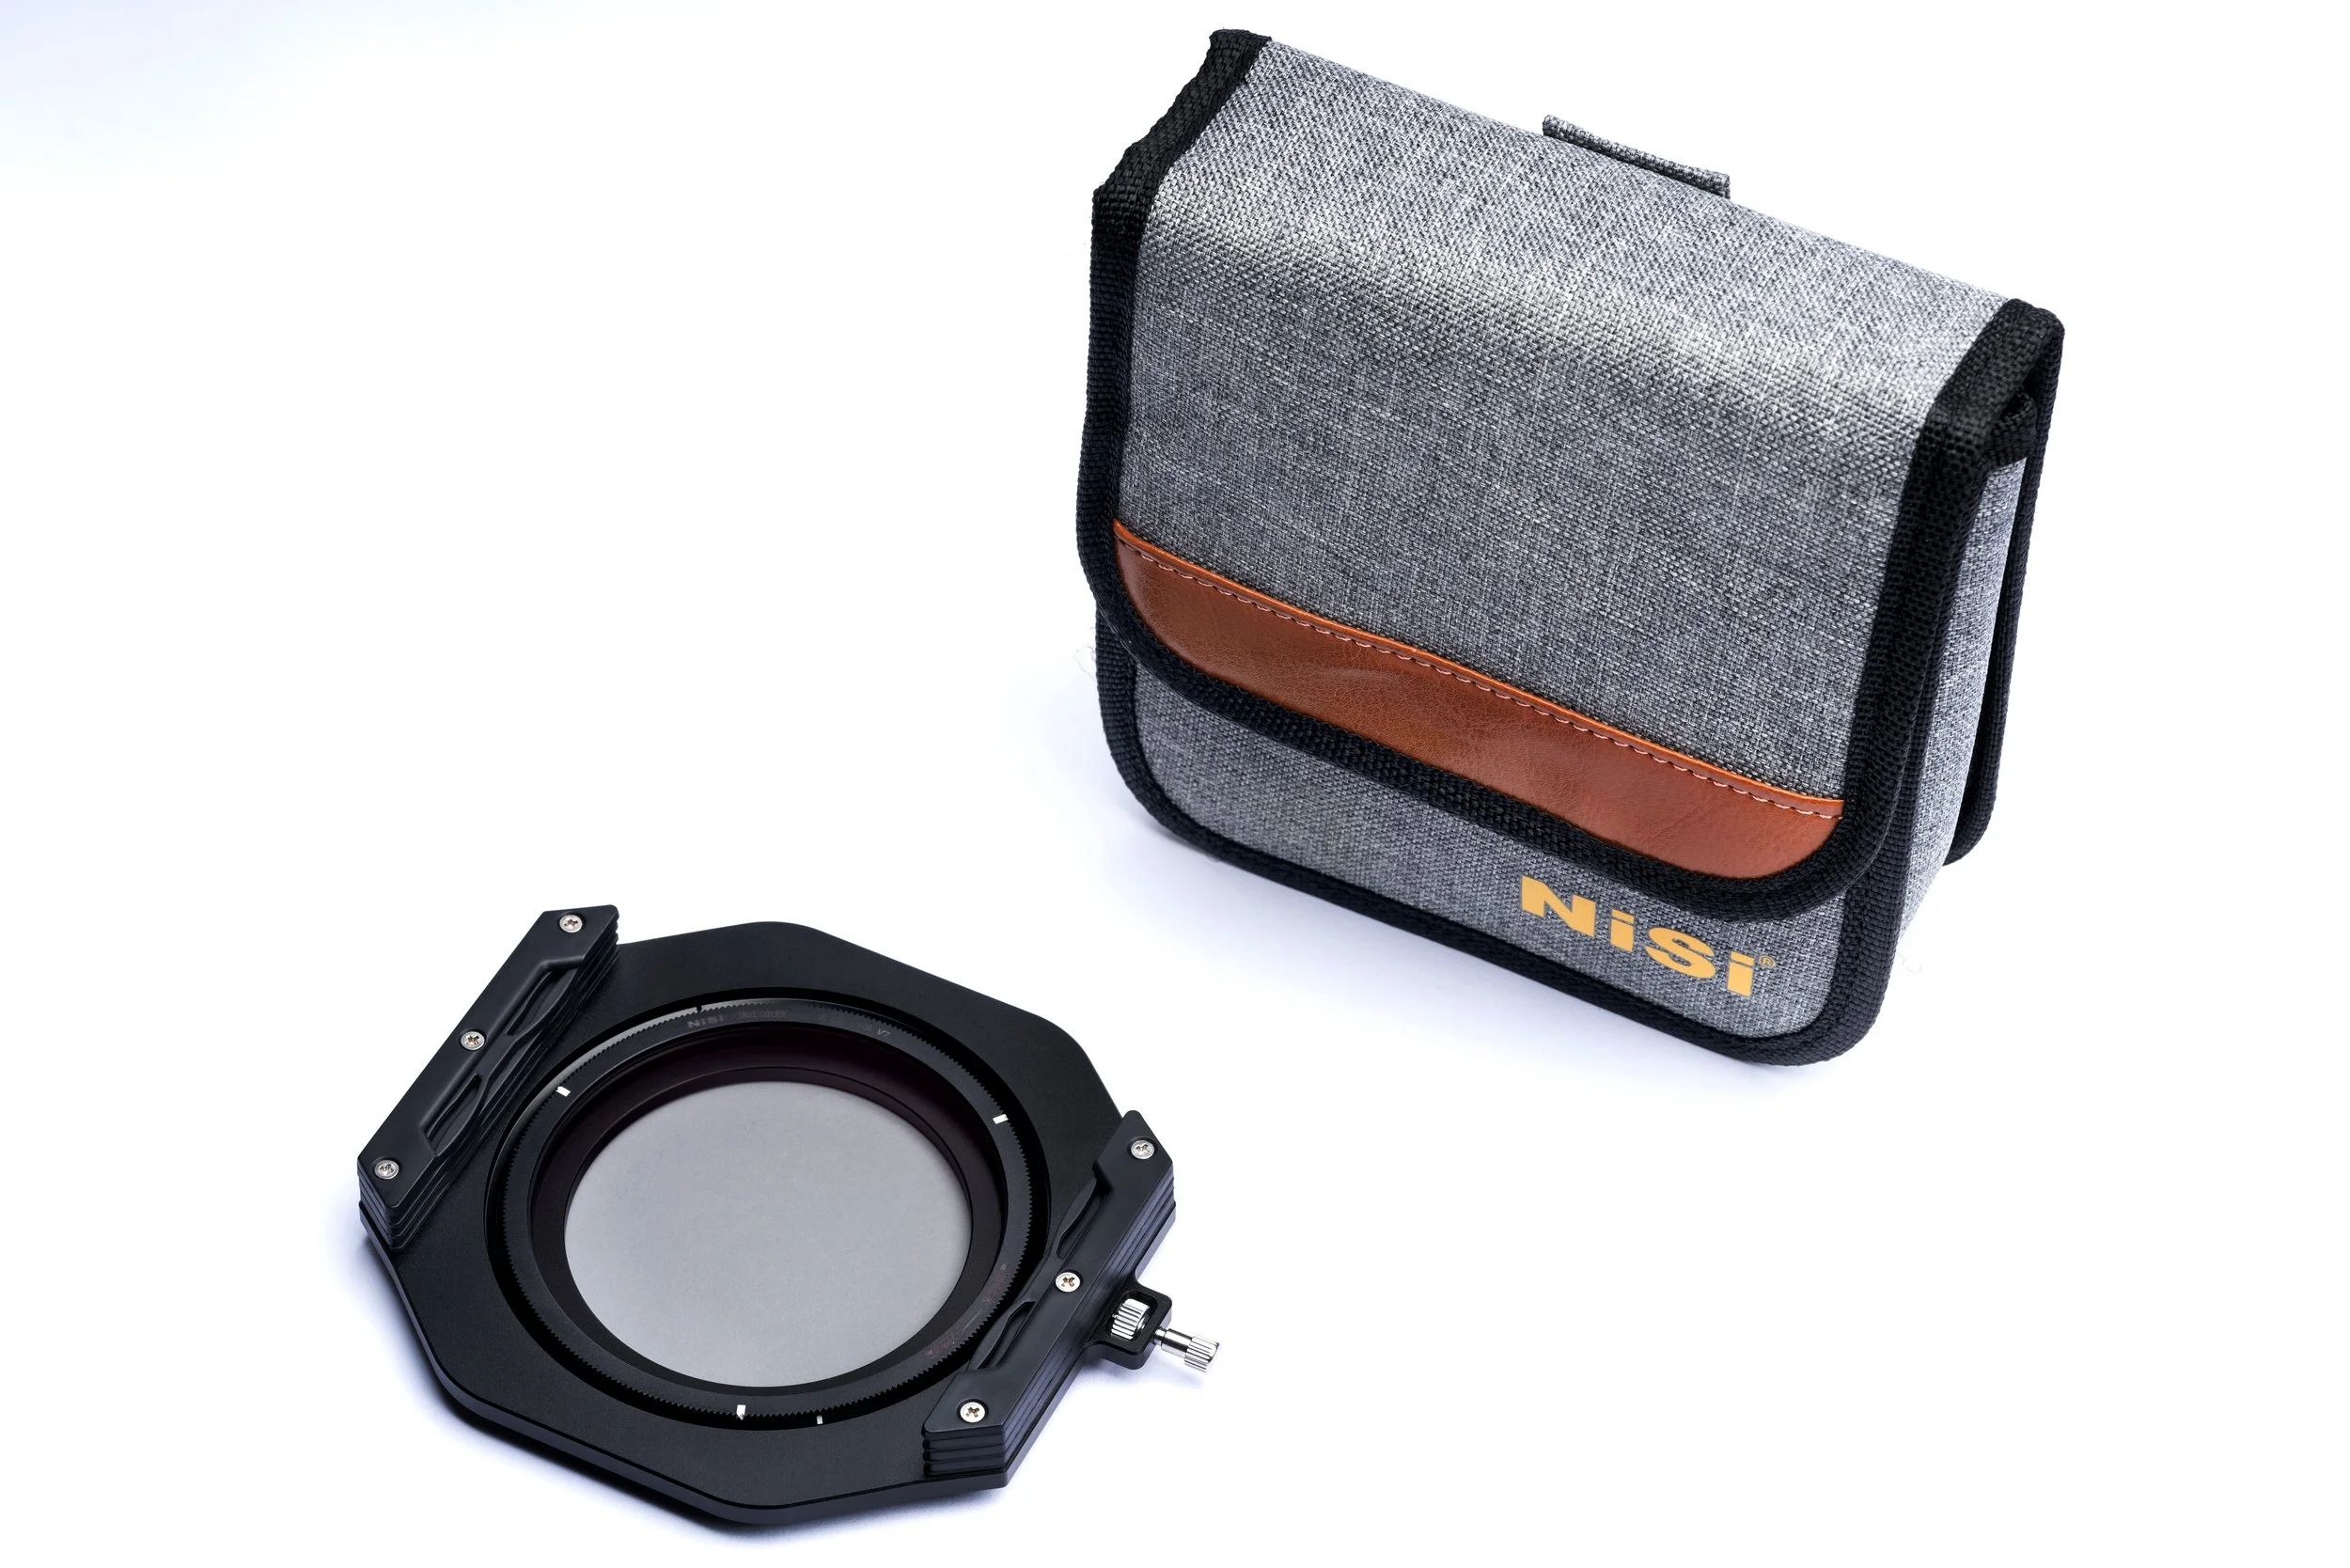
NiSi V7 Kit
Including pouch to store holder, polariser and step-up rings
How does the NiSi V7 Filter system work?
Like the V5 and V6 before it, the NiSi V7 Filter platform is a square filter system consisting of the Main Adapter Ring, a CPL Filter, and a Filter Holder that out of the box can hold up to three 100mm filters (100mm x 100mm and 100mm x 150mm).
With the use of a step-up ring, you can adapt the system to fit most lens thread sizes.
Two types of 100mm filters fit the holder. The square 100mm x 100mm are Neutral Density (ND) filters. These filters fit over the entire front of the lens. To avoid light leaking, I mount ND filters in the slot closest to the front element.
The other 100mm filters are rectangular 100mm x 150mm, where the neutral density is graduated across the filter. You can slide these filters to align the darker part of the filter with the brighter part of the scene.
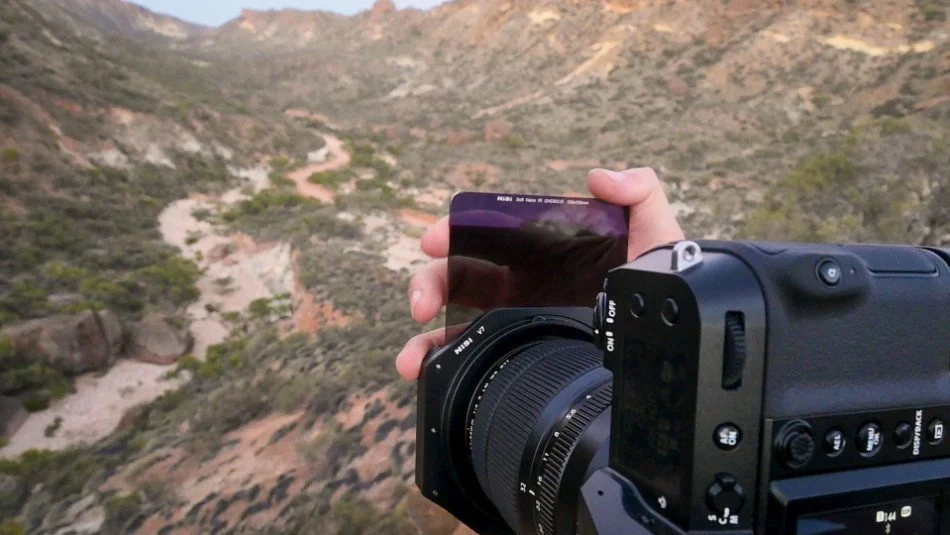
Attaching a NiSi 0.9 Grad ND
The True Colour Polarising Filter is a circular filter that screws into the Main Adapter Ring behind the Filter Holder.
One of the advantages of the NiSi system is while the polariser is behind the filters, you can quickly turn it using one of the two rotation wheels without removing the filters.
What are the advantages of a square filter system?
First, if you use multiple lenses with different thread sizes, the benefit of a square filter system is that you only have to purchase one set of filters, and through using the step-up rings, you can adapt the system to attach to any lens thread size.
As you develop your landscape photography, you'll typically shoot different scenes in varied lighting conditions, each requiring different filters or combinations of filters.
Instead of buying a filter to match each lens size, you use. You can purchase a relatively inexpensive step-up ring that allows you to use the filters on a different size lens.
What is included in the NiSi V7 Filter Kit?
Filter Holder - with three filter slots
Main Adapter - with a bayonet fitting and 82mm screw thread
True Colour Circular Polariser - that fits a bayonet attachment
Three step-up rings - 67mm, 72mm, and 77mm. If you have a lens with a different thread size, other step ring sizes are available for purchase.
Pouch - stores holder, adapter, and step rings. Attaches to the leg of a tripod with a velcro strap, making it convenient to access different parts of the system while you're out in the field.
Plastic Lens Cap - fits over CPL and main adapter while attached to the lens.
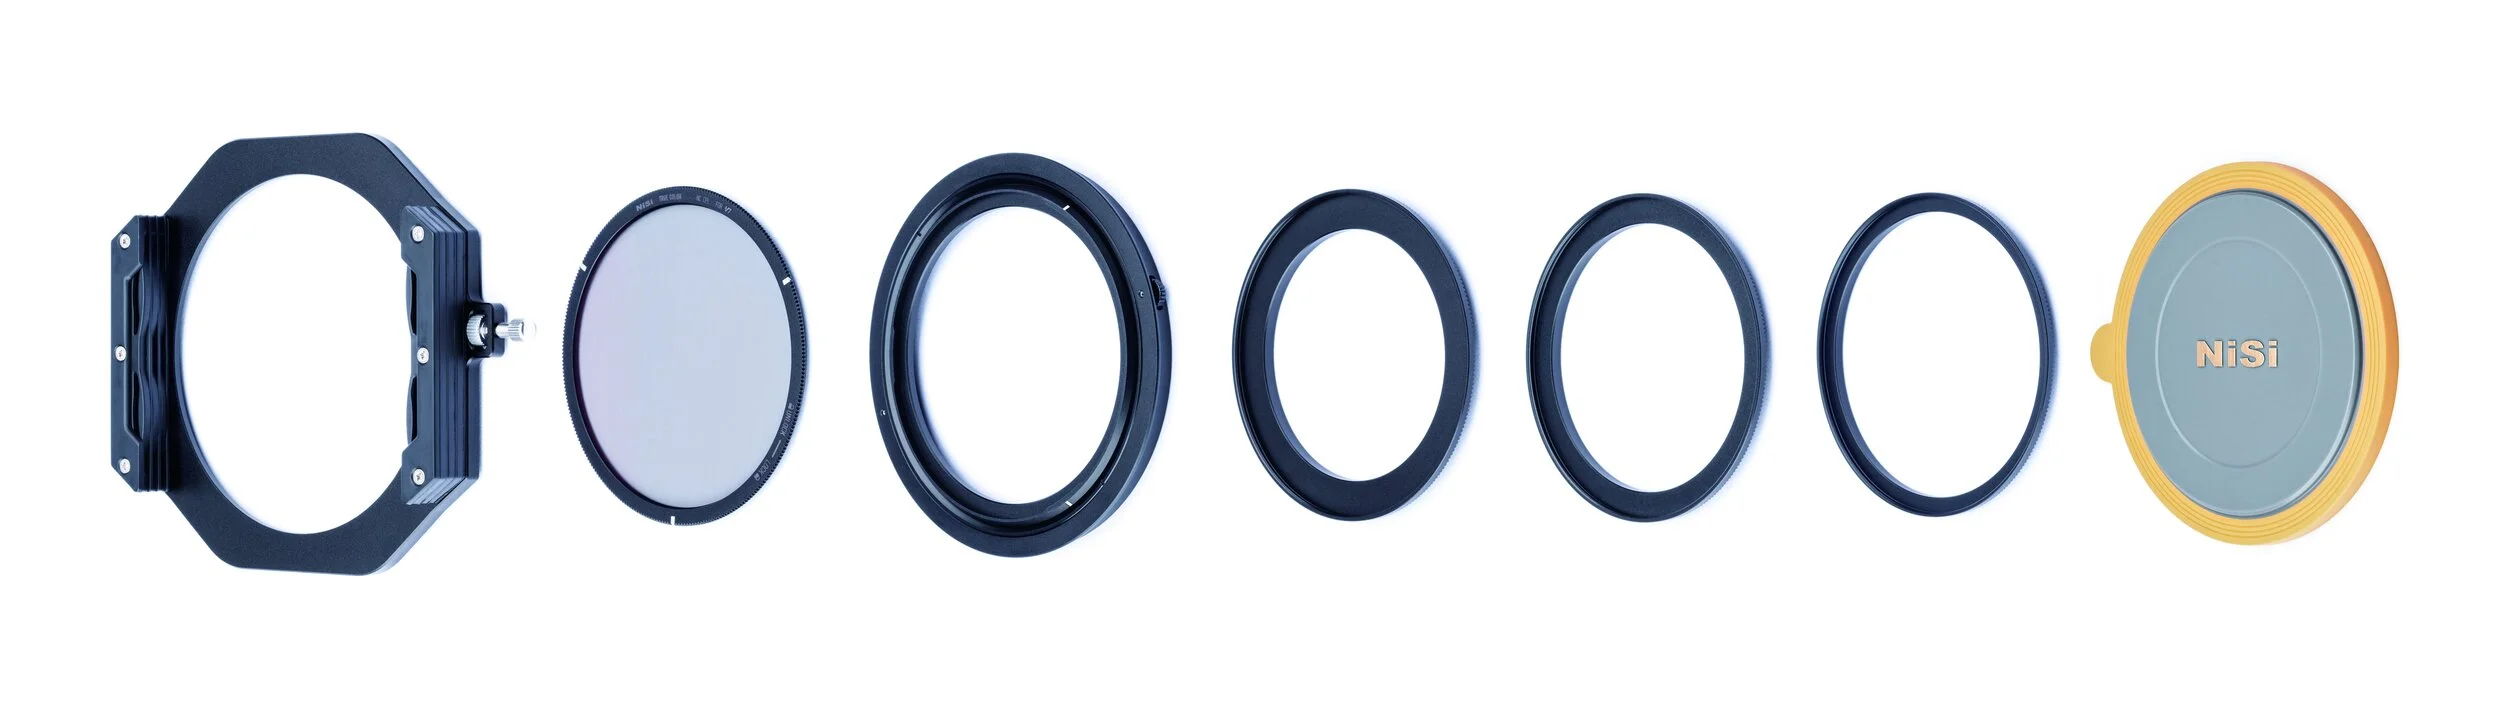
Components included in the NiSi V7 Filter Kit
What are the improvements of the NiSi V7 system over the V6?
NiSi has upgraded the holder with an intuitive single-pin locking mechanism. They've also introduced the True Colour Polarising Filter, which has less color cast providing more natural colors. In addition, the CPL now uses a quick bayonet attachment.
Improved Locking Mechanism - H3
NiSi has combined the locking screw and release pin into the one locking mechanism, a single pin with a locking nut.

Two pin system on the NiSi V6
With the V6, I would forget which pin locked the holder and which one would release it from the adapter, so I'd need to look at the back to work it out. NiSi has modified the V7, so the single pin releases the holder while the nut screws to lock the pin in place, locking the holder.
It may seem a small thing, but using different operating components to carry out different functions, I find it more instinctive to use the locking mechanism of the V7.
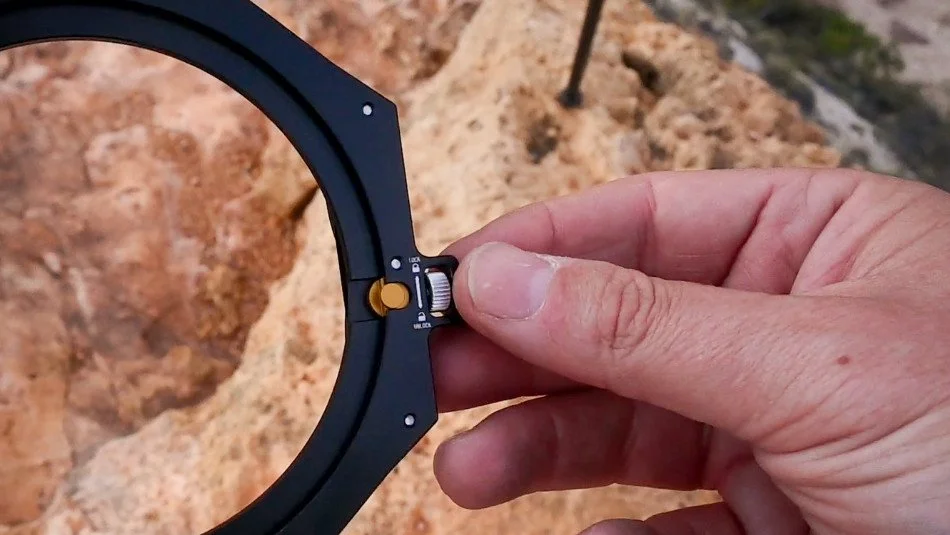
Improved locking mechanism on the NiSi V7
CPL Bayonet Attachment - H3
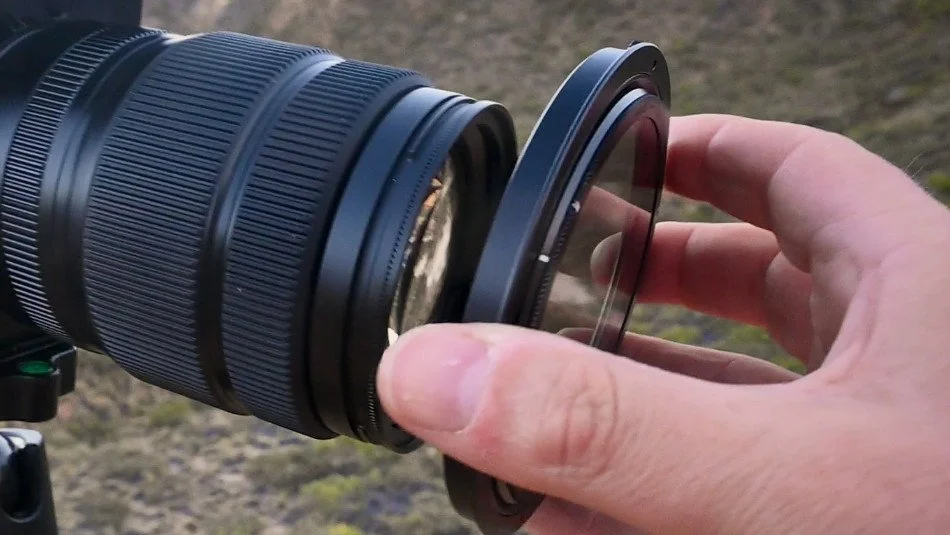
The Circular Polariser attaches to the central mount through a bayonet system instead of screw thread. This approach makes attaching the CPL much easier and swapping over CPL quicker.
To mount the CPL, simply line up the three white marks on the edge of the CPL with the three markings on the main mount. Then with your thumb pressed on the adjustment wheel, turn the polariser slightly clockwise to fix it in place.
True Colour Polariser Filter - H3
NiSi has also made changes to the Polarising Filter itself. The V6 system came with the NiSi Enhanced Landscape Polarising Filter, and the V7 Kit comes with the new NiSi True Colour Polarising Filter CPL NC. You can purchase the Enhanced Landscape CPL separately.
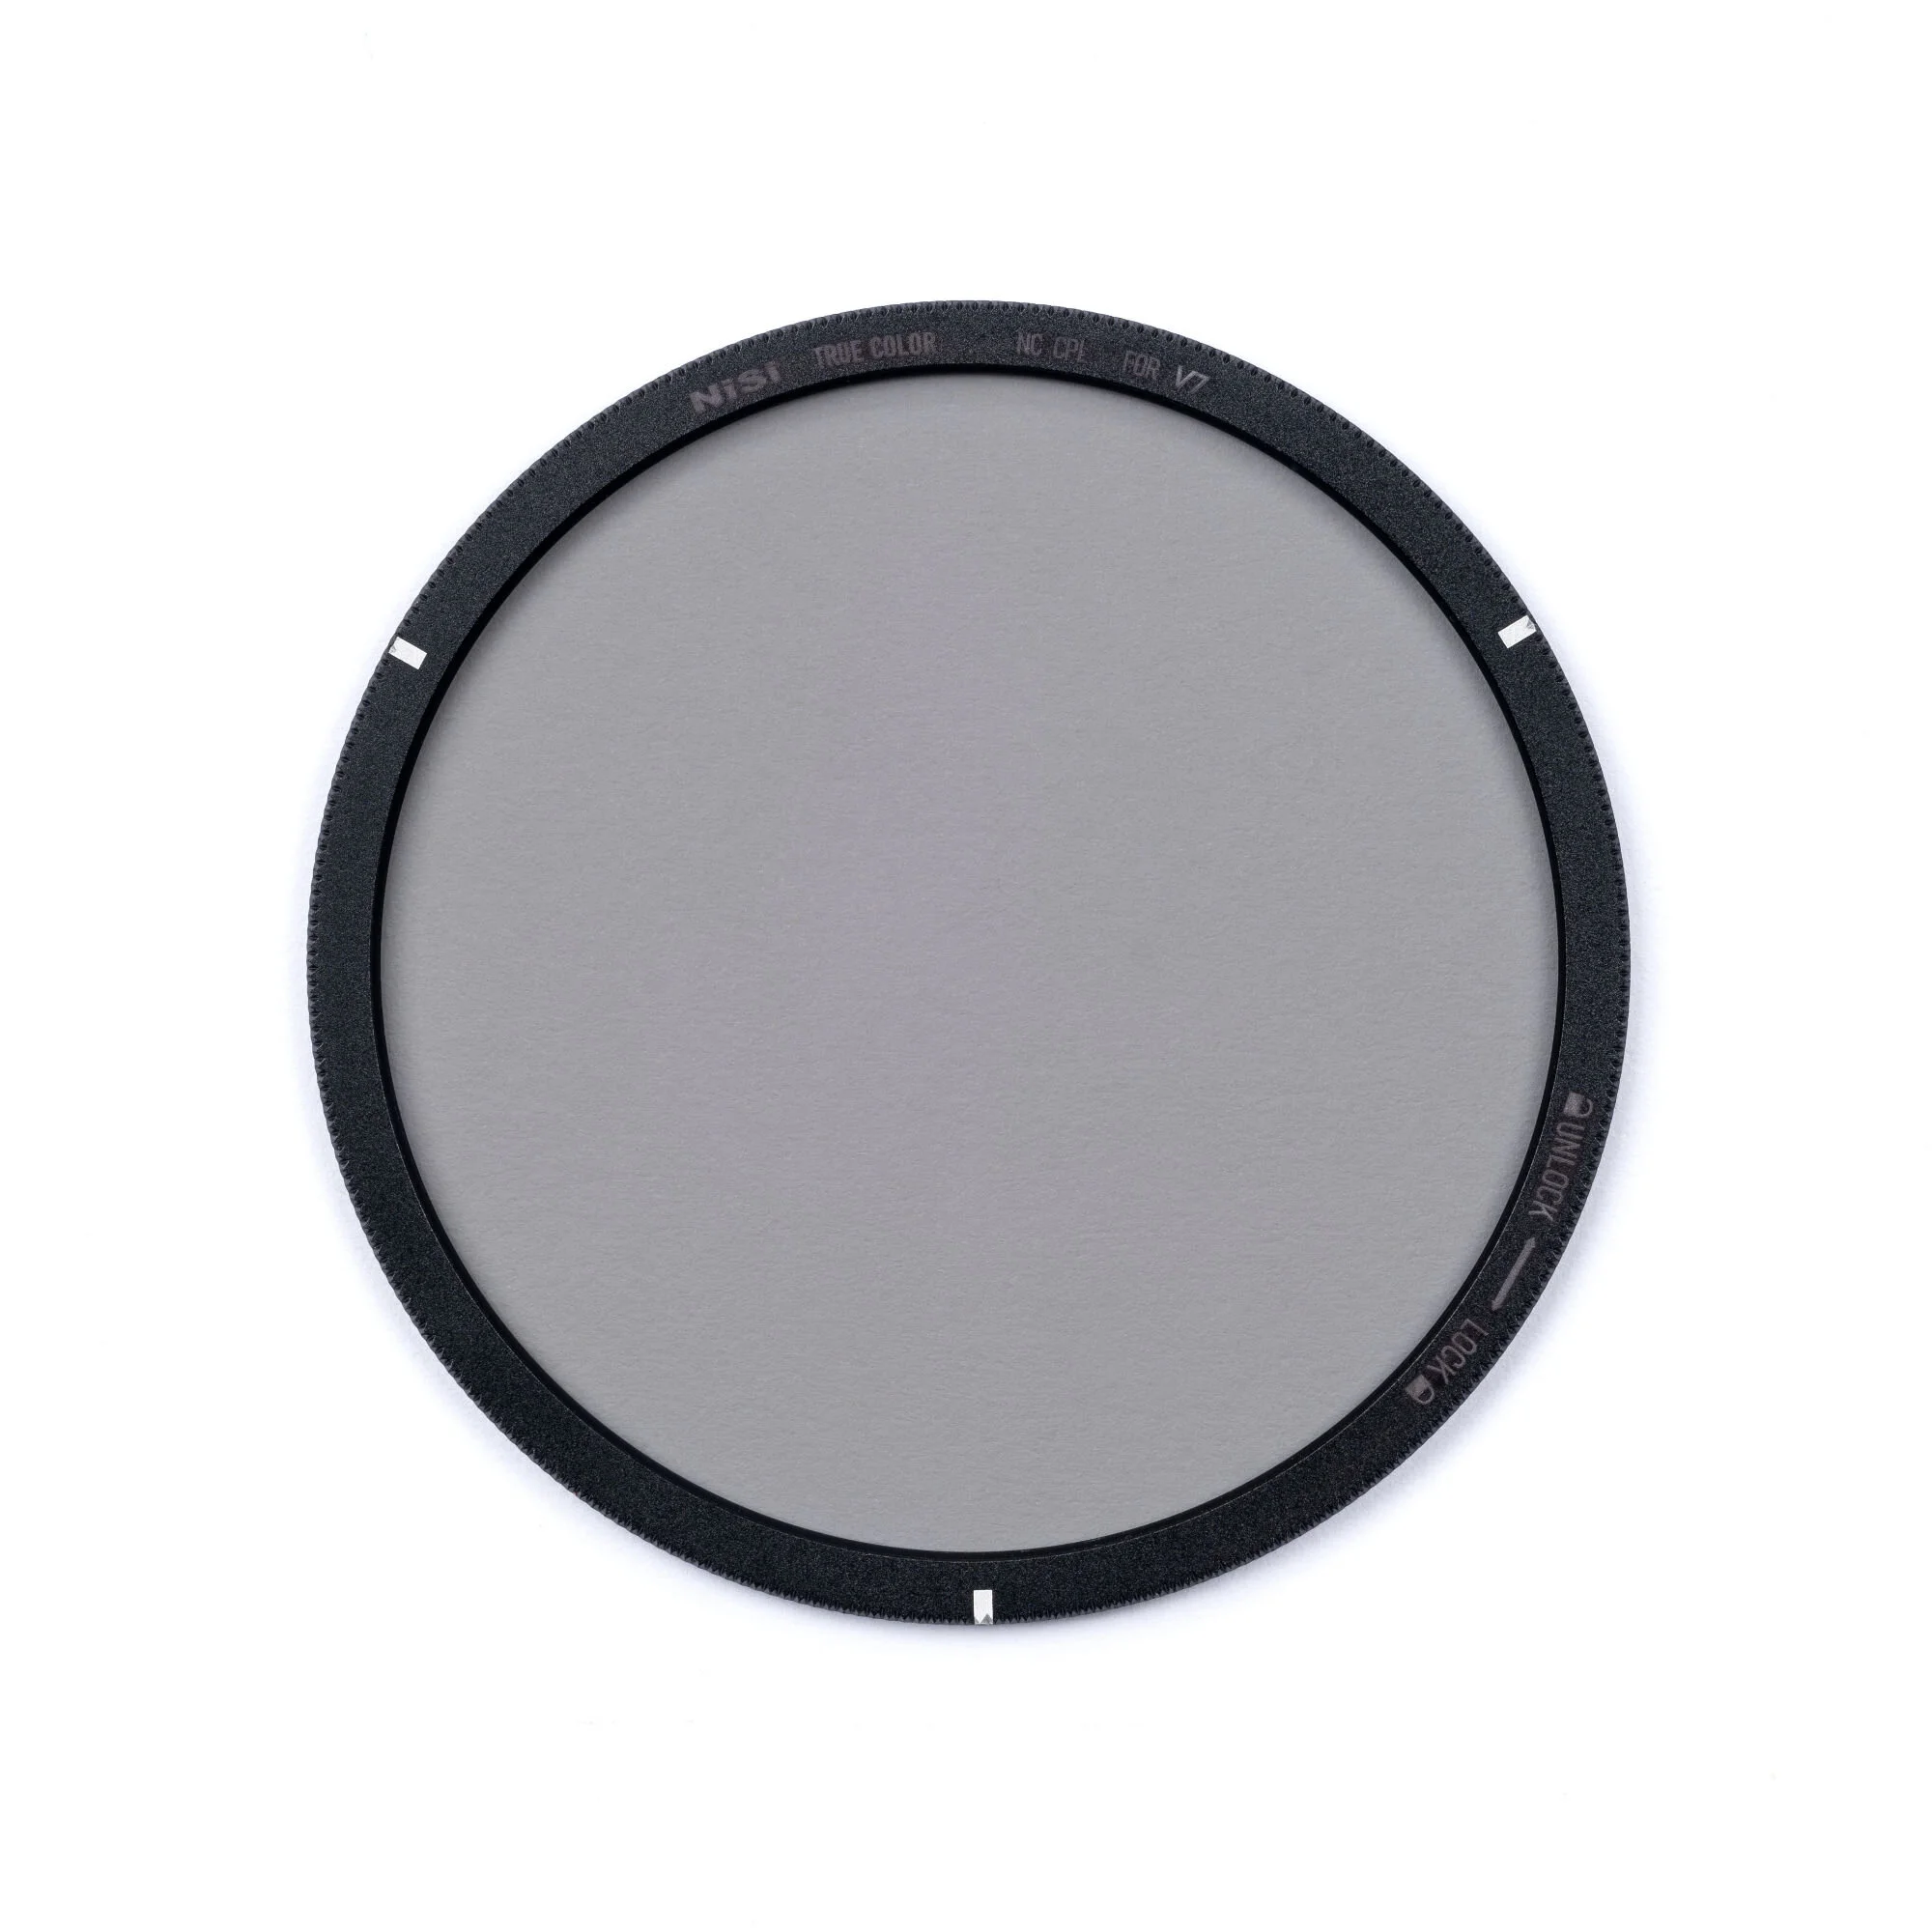
As its name suggests, the True Colour Polariser effectively reduces glare and haze in the scene without impacting the colors, leaving them as close as possible to the colors seen by the naked eye. The Enhanced Landscape Polariser produced an enriched color effect. However, I often noticed a magenta or warm orange color cast to the captured image and added contrast, which I needed to correct in post-production.
I prefer the effect of the True Colour Polariser filter on a scene as I didn't notice any color cast, so the colors captured in-camera are closer to those I saw while on the location. This polariser's minimal contrast effect on the image is also ideal as it doesn't unnecessarily increase the scene's dynamic range.
I found that the RAW file captured by the camera with the True Colour CPL required less color correction to counteract any color cast and provided a file that was an excellent starting point for editing.
How do the Square Filters Mount in Holder?
Carried over from the V6 system, the V7 filter holder applies pressure to the filter's outer edge to hold it in place. This approach to mounting the filters is better pinching the back and front of the plate, like other systems.
The advantage is the pressure applied is more consistent, so it's easier to adjust the filter up and down more precisely.
I discovered it requires less effort to position the filter into place, even with one hand.

The left side is filtered through the True Color Polariser and the right is with no polariser
How many filters does the NiSi V7 system hold?
The improved approach to holding the filters means you can fit up to three filters simultaneously in the V7 holder. That's in addition to the CPL, providing plenty of flexibility to add different filters depending on the scene's lighting conditions.
Typically, I use one to two filter slots, plus a polariser. However, it's nice to have a third slot available if needed.
Can you use your lens cap with the NiSi V7 system?
Unfortunately, your standard lens cap that came with the lens will no longer fit with the adapter ring mounted to the lens. To solve this, NiSi offers a larger lens cap that fits over the entire mount and CPL, so you can have the system permanently attached to your lens and still protected by a lens cap.
How to Properly Mount the NiSi V7 Filter Holder to your lens?
Work out the thread size of the lense - If the thread size is 82mm, then the main adapter ring will screw directly onto your lens. If the thread size is smaller than 82mm, you need to use a step-up ring to go from the thread size of the lens up to 82mm.
Thread the step ring onto the lens - If you determine you need a step ring from step 1, screw the step ring directly onto your lens. Tighten firmly, but take care, not to over tighten. Also, be careful not to force the ring as you're turning, as you may end up cross-threading the ring. Tip: Check the lens thread and ring for sand or dust before attaching.
Attach the True Colour CPL to the mount - Find the white markings with the NiSi mount in one hand and the CPL in the other. Place the polariser over the mount and line the white marks up. The CPL attaches through a bayonet connection. Once you've placed the CPL in the mount, turn it slightly clockwise to fix it in place. Skip this step if you don't require a polariser for the scene you're capturing.
Attach the NiSi mount to the lens - With the CPL in place, screw the mount onto the ring you previously attached to your lens in step 2. Again, take care not to cross-thread the mount. These components can all remain on the lens even when stored in your camera bag with the NiSi Lens Cap attached.
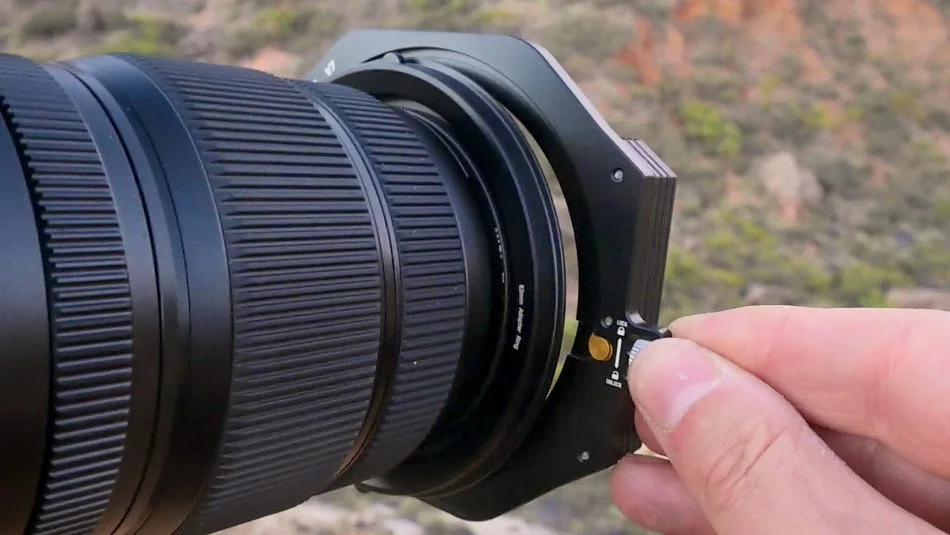
Mount the Filter Holder to the adapter - Holding the Filter Holder in your dominant hand by the release pin, locate the two clips on the opposite side. Place the two clips behind the ridge on the main adapter using your other hand to guide. With the pin pulled out, position the other side of the holder against the adapter and release the pin.
Lock the Filter Holder - You can now rotate the Filter Holder to the desired position. To lock the Filter Holder in place, turn the locking screw until it's against the inner edge of the locking mechanism. There are arrows on the back of the holder that tell you which way to turn the locking screw. Tip: I recommended locking the holder in place before inserting any filters into the holder.
NiSi Caddy 100mm Filter Pouch
I'm starting to build my collection of ND and Grad ND filters. While each filter comes in a felt-lined synthetic leather envelop, I don't find it particularly easy having the individual filters floating around in my camera bag.

I now store my filters in the NiSi Caddy Pouch, which you can purchase separately. The Caddy Pouch holds up to 9 filters (4 x 100x100mm and 5 x 100x150mm). I can hold the Pouch over my shoulder using a large strap or attach it conveniently to my tripod using a smaller strap provided.
Check out the video below of my photography adventure to Exmouth and I share capture a shot using the NiSi V7 for the first time.
Final Thoughts on the NiSi V7 Filter Kit
NiSi has made some fantastic improvements to their 100mm Filter kit. The single-pin locking mechanism of the NiSi V7 is an excellent improvement over the two-pin system of the V6, and I found the bayonet mount for the CPL quicker to use, and it's easier to attach and remove as a result.
The best upgrade is the True Color Polariser Filter. Its effect on the captured image is significantly better, and I've enjoyed the results I've achieved with this polariser.
The True Color CPL only comes with the bayonet attachment, it's not compatible with the V6 system, so this could be a good reason to upgrade to the V7.